Knee Pain with Lunges (HERE’S YOUR SOLUTION!)

Train without pain and see faster results with ATHLEAN-X
http://athleanx.com/x/less-pain-equals-more-gains

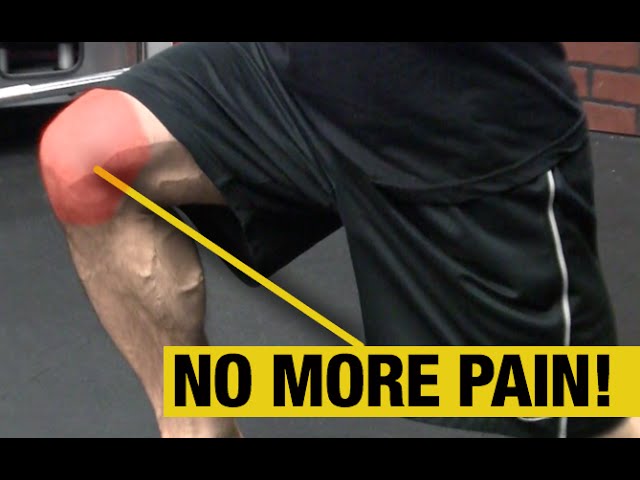
Knee pain is one of the most common side effects when doing lunges. In fact, leg workouts are compromised most often by discomfort in the knees when doing the very leg exercises that are supposed to be helping in the first place. In this video, I show you how to correct one of the most common sources of knee joint pain in your leg workout, the forward lunge.

The forward lunge is particularly harsh on the knee for a variety of reasons. First, with the foot beginning the exercise in an open chain position, there is less stability provided at the knee joint itself. An open chain leg exercise is one in which the working foot is not in contact with the ground or a similar stabile surface. As you can see in the initial phase of the lunge, your foot is in the air. Combine this with the fact that the knee is in a partially flexed position and you realize that there are increased eccentric loads being placed on both the quads and the tendons of the knee.

When your foot finally makes contact with the ground, the ground reaction forces are directed up through the leg and borne by the already eccentrically stretched knee. For someone that is suffering from patellofemoral knee pain, this can feel like a sharp knife being driven into the knee joint.

The next thing you want to consider is that the direction of the lunge, being forward, is placing a natural vector of the force anteriorly. This acts to drive more load into the anterior structures of the kneecap and puts additional strain on the patellar tendon and patella underneath.

In a reverse lunge however, the knee on the working leg is supported from the very beginning of the exercise. With the foot placed in a closed chain position, you don’t have to worry about the shock factor that occurs when the foot strikes the ground as in the anterior lunge. The force is actually directed more vertical and back which helps to load the hip and the quad better, making this an even better exercise for helping to build bigger quads.

Finally, with the hip slightly more flexed than in an anterior lunge, you help to put the rectus femoris on slack which eases some of the strain being borne across the patellar tendon in the knee. This helps to alleviate some of the knee pain commonly found when doing the regular lunge.

As you can see, you don’t have to stop lunging all together if you get knee pain when doing lunges. You just have to alter the direction in which you’re lunging. It’s these kinds of modifications that make the difference between training and just working out. If you want to start training, and training like an athlete then head to http://athleanx.com and get the physical therapist created ATHLEAN-X Training System.

For more videos on how to fix knee pain with squatting and also what causes patellar tendonitis, be sure to subscribe to our channel here on youtube at http://youtube.com/user/jdcav24

How to Fix Wrist Pain | Working Out (6 WAYS!)

Build muscle and end joint pain – http://athleanx.com/x/athlete
Subscribe to this channel here – http://bit.ly/2b0coMW

Wrist pain during workouts is one of the most common joint ailments you can experience. In this video, I’m going to show you how to fix workout related wrist pain by going over the best ways to address joint and muscle causes as well as things you can do on specific exercises.

To start, I think it is beneficial to try and pinpoint where in your wrist you are feeling pain. For example if you feel wrist soreness on the back side of your wrist in the area of the carpal bones, then you are likely dealing with an impingement or joint immobility issue rather than a muscular one. Here you would want to incorporate the joint mobilization for your wrist to help restore normal extension.

This simple wrist mobilization is one that you can do yourself with no equipment at all. Simply squeeze your wrist with your thumb and forefinger and distract that carpal bones just enough to clear the end of the radius. From here, glide the wrist radially and move your wrist into extension by pushing the hand palm down into a bench. You should not experience pain when you do this. Do it for a few reps and then retest your range of motion and you should notice that it has improved significantly.

If on the other hand your discomfort is more on the underside of your forearm and tends to run up and down the forearm when your wrist is bent backwards, then this is more indicative of a muscle tightness. Here you don’t only want to just stretch the muscles of the forearm by bending your wrist back and keeping your fingers straight but you want to manipulate the tissues themselves with some myofascial release.

You can do this by pressing your forearm into a solid surface (like a squat rack upright) and then flossing the muscles through the compressed area by moving the wrist around in circles as well as back and forth into flexion and extension. Do this until you feel the pain subside in your forearms.

The next step once you have addressed the type of pain that you feel in your wrists when working out is to identify the specific exercises that you get soreness in when you lift. The most common ones that I covered in this video are the bench press, pushups, bicep curls and the front and back squats. Each one of them demands a little something different than the others and therefore must be addressed individually.

Through some fine tuned careful changes in the position of the grip or the placement of the bar in your hands, you will see that you are able to correct the pain that you are feeling without diminishing the effectiveness of the exercises.

This is the same approach that we use that has led to ATHLEAN-X becoming the go to choice for professional athletes in their training and workouts. We not only show you how to make gains in muscle size and how to lose fat but we put the science into everything we do and keep a priority on doing it safely so you can keep lifting at a high level for a long period of time. You can get the program by visiting http://athleanx.com and selecting from our various workouts based on your individual training goals.

For more exercises for your wrists and ways to strengthen your wrists, be sure to subscribe to our channel here on youtube at http://youtube.com/user/jdcav24

How to Fix a Stiff Neck in Seconds (THIS WORKS!)

Build your body with science here – http://athleanx.com/x/athlete
Subscribe to this channel here – http://bit.ly/2b0coMW

If you ever tried to lift with a stiff neck you quickly find out how difficult it really is. Not only will your lifts suffer but you may wind up hurting yourself even more by attempting to do this. That said, imagine if you had a quick weapon in your arsenal that allowed you to quickly make the pain go away and restore the range of motion that you were lacking because of the stiffness. I’m going to show you exactly that in this video.

If you have a tough time rotating or turning your head to the left or right, you likely have one of two scenarios that are contributing to this problem. The first is a tissue restriction (most often muscle) that is preventing your vertebrae from moving as they would like. The second is a stuck joint that is preventing the vertebrae from moving as they would like. As you can see, in either case, the cervical vertebrae are not moving as they should and this is causing you pain and discomfort while limiting your ability to lift.

Time to fix that. We start by realizing that rotation of the head in one direction or the other has an opposite reaction when looking at the spine from the standpoint of the spinous processes that sit behind each vertebrae body. In other words, when you turn your head to the left, your spinous process on your vertebra are turning to the right. This is important to know since this forms the basis of your treatment.

With a towel, you place it around your neck and grasp each end with a hand. The towel should be at the level of the discomfort that you feel in your neck when you currently turn your head. This can be felt with either the towel on the back of your neck with by palpating the neck for soreness as you move down one vertebrae at a time. With the towel in the right location you begin by pulling harder on the hand that is opposite the direction you want to turn your head.

For example, if you wanted to turn your head to the left you would pull forward and with more force on the right hand. The left hand would be there to simply stabilize the towel. As you pull forward you then want to rotate your head to the left. You should find that both your range of motion will have been greatly improved and your pain should have subsided.

Do this for about 10 reps and then rest. You can do it again a few more times if needed later in the day to reestablish the proper mechanics and allow your spasmed muscles to subside. Once your neck is back and moving free of discomfort you can resume your hard training and start making those gains again.

Speaking of gains, if you are looking for a complete workout program that puts the science back in strength so you can make your best gains ever be sure to visit http://athleanx.com and get the ATHLEAN-X Training System. Start taking your entire training approach seriously and start seeing the best results you ever thought possible in just the next 90 days.

For more videos on how to fix a popping shoulder and how to fix anterior pelvic tilt, be sure to subscribe to our channel here on youtube at http://youtube.com/user/jdcav24

IT Band Syndrome and Knee Pain (HOW TO FIX IT!)

Fix tightness and build an athletically functional body here
http://athleanx.com/x/build-the-body-of-an-athlete

Many lifters, runners and bikers will get pain on the outside of their knee or thigh and think that they have IT Band Syndrome because they’ve been told that they do. Unfortunately, the IT Band is just caught in the middle of some pretty significant problems in one of likely four other muscles. In this video, I show you how four muscles in the hip actually contribute to the pain and tension felt in the Iliotibial band and what you need to do to fix them. Here’s a hint, you do not want to foam roll out the IT Band unless you want more pain and discomfort.

The IT Band is a thick fibrous tendon that runs along the lateral aspect of the thigh and connects from the hip to the tibia on the outside of your knee. This tendon has the ability to withstand changes in tension to it by having up to 1000 pounds of resistive capacity. If you think that you are going to be able to foam roll out the tightness that may be present in this structure you are sadly mistaken.

That said, you can definitely influence the tension present in this band by addressing the muscles that insert into the IT Band. The gluteus maximus, lateral hamstrings and quads and tensor fascia lata are all muscles that feed into the iliotibial band. When any of these muscles are tight they pull on the band and cause it to be not just tight but also out of balance with the rest of the tension that is contributing or feeding into it. This can cause a pulling on the femur and make it hard to properly execute a squat or ride a bike without feeling pain in the outside of your thigh or knee.

Instead of foam rolling the IT Band, you want to compress and floss the offending muscles feeding the tension. Here I show you two of these mobility drills that you can do to decrease the tension in a hypertonic muscle such as the TFL or the lateral quads. You want to use a resilient structure like a lacrosse ball or the fat gripz that I’m using here, since they have a much lower profile than the foam roller. This allows you to keep your leg in contact with the ground and move it into hip flexion as if you were while doing a squat.

If you do not feel any discomfort at all in these movements when you place the muscle in contact with the grips, then you likely do not need any work on this muscle. This is one of the biggest places people waste time in the gym these days. They see every mobility drill in the books and want to add it to their routines, not realizing that the wrong mobility drills when performed can actually do more to put you out of balance than bring you into it!

Mobility work is only effective if you are mobilizing structures that need it in the first place. Same goes for training and workout programs. Doing what you think looks cool or because someone else told you it was, is not the prescription for an effective workout plan. Doing what needs to be done and only what needs to be done while ignoring the rest of the broscience out there is a great way to get results and get them faster. You can do that by getting the ATHLEAN-X Training system available at http://athleanx.com

For more hip mobility videos and ways to help stretch a tight IT Band, be sure to subscribe to our channel here on youtube at http://youtube.com/user/jdcav24

7 Core Exercises for Low Back Pain (IMPORTANT!)

Get ripped abs and a strong core training like an athlete
http://athleanx.com/x/get-a-ripped-athletic-core-here

Do you have low back pain or tight hip flexors and have been told you need to do more core exercises to get your core strong and get rid of your problems? If so, you need to watch this video and see the truth about ab and core training when it comes to lower back pain and lower body tightness.

Your body craves stabilization, particularly in the area of the spine. If you have any type of instability in this crucial area, your body will find ways to compensate to create the strength that you lack. In the best case scenario, your abs and core would be providing the stability that your spine needs. Unfortunately, often times this is not the case. Weak core muscles and abs in particular can cause your body to seek out alternative muscles to provide the help that is sorely needed.

The hip flexors are prime targets of this request. This becomes problematic since the hip flexors attach to the sides of your lumbar vertebrae. When these muscles tighten up in order to provide additional stability they begin to pull on the vertebra in your lower back and lead to imbalance and often times pain. The stabilization is there, but it’s not coming from the right muscles, and this is a problem.

So, what are we told to do to rectify the back pain we are feeling from having tight hip flexors and a tight low back? We are told to stretch the muscles in our hips and lower back. This is a big problem and actually the exact opposite of what you need to do to overcome your problem. You have to stop looking solely at the site of the symptoms and instead look for the cause. In this case, you would have seen that the weak abs are a root of the issues you are having in your hip flexors and lower back.

But it’s not that simple. Maybe you are told correctly that you have to get stronger abs and a strong core so you start doing all kinds of ab exercises to help you do that. Unfortunately, if you choose the wrong ab exercises (not that they are bad at all, they are just wrong for your particular condition) you could wind up making your lower back pain and hip flexor tightness worse.

Many different ab exercises enlist the help of the hip flexors as a prime mover. This occurs a lot in lower ab exercises but can also occur in things as simple as the crunch. If you allow your ab training to include too many of these you will wind up simply over strengthening the hip flexors more and leads to a vicious cycle of more pain.

Start following the ab and core exercise alternatives you see in this video for a great way to get a stronger core without overtaxing your hip flexors. There are plenty of options for you to do, just maybe not the ones you would have immediately thought of. Start with these and you will see how much more quickly your tightness will go away when your ab and core strength starts providing the stability your back was craving all along. The hip flexors and lower back will finally be able to take a much deserved break.

For a complete ab and core exercise program to build a ripped athletic core like an athlete, head to http://athleanx.com and get the ATHLEAN-X Training System.

For more core exercises and ab workouts to do for lower back pain, be sure to subscribe to our youtube channel here at http://youtube.com/user/jdcav24