Shoulder Pain and Popping (SHORT & LONG TERM FIX!)

Build a ripped athletic body while fixing your shoulders here…
http://athleanx.com/x/get-a-bulletproof-body

Shoulder pain and popping is one of the most common causes of missed workouts. Shoulder injuries are incredibly popular among gym goers, but not surprising when you consider the amount of mobility the shoulder joint has and the many ways we abuse that in our training. In this video, I’m going to show you a short term and long term fix for shoulder pain and the popping, cracking, etc that goes along with it. Start training hard and stop letting your bad shoulders get in the way of your progress in the gym.

First, you must understand that there are many potential causes of shoulder pain when working out. Most often however it comes from an imbalance between the internal and external rotators of the shoulder. Unless you make a conscious effort to incorporate external rotation exercises into your shoulder workouts you will not do anything to counteract this from happening.

The role of the rotator cuff muscles in your shoulders are to do exactly this. They are there for external rotation of the glenohumeral joint to help keep the arm in a good position as you raise it up overhead. The rotator cuff muscles (three of the four muscles) will externally rotate the humerus to keep it from banging into the acromion as you elevate the arm. They also keep the head of the ball and socket centered in the socket with the elevation as well.

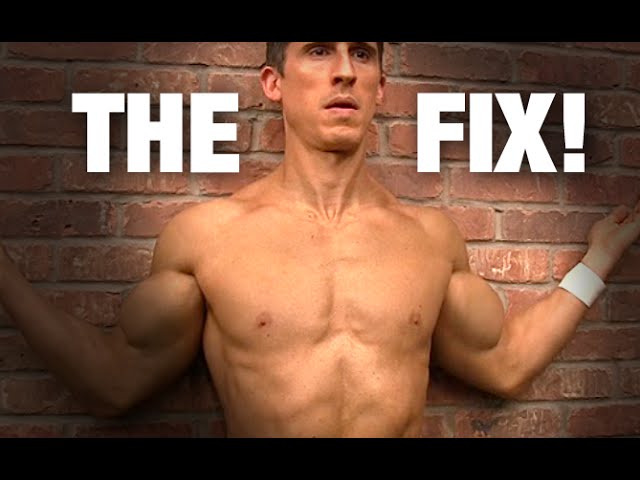
In order to temporarily reposition an internally rotated head however, you want to do the drill that I’m showing you here. Begin by placing your back against a wall and trying to keep the back of your elbows and the radial side of your index fingers in contact with the wall. Try to raise both arms overhead (keeping the elbows against the wall every inch of the way until you reach the height of your shoulders). At this point you will allow your elbows to come off the wall but you want to keep your fingers against the wall for the remainder of the raise.

Slowly lower your arms back down to your sides and repeat the movement for a total of 5 to 6 reps. You may find that with each rep you are able to keep your fingers and elbows in contact with the wall further and further. When done, step away from the wall and attempt to raise your arms up overhead again. If you had shoulder pain and popping or clicking before, you should see that almost all of it is gone now.

You’ve effectively repositioned your humerus by activating the shoulder external rotators. This is a short term fix however. In order to do this long term you must incorporate rotator cuff strengthening into your daily workout program. We have a complete training program that not only helps you to build ripped athletic muscle but keeps your shoulders and joints healthy at the same time. This is called the ATHLEAN-X Training System. You can get this program at http://athleanx.com and start seeing your best and safest results ever.

For more videos for shoulder pain when working out as well as exercises for shoulder pain, be sure to subscribe to our channel here on youtube at http://youtube.com/user/jdcav24
Shoulder Stretch to Fix Your Shoulders (GET DEEP!)

Build bigger shoulders while keeping them healthy with A-X
http://athleanx.com/x/bigger-shoulders-safer-shoulders

Shoulder pain is one of the most common ailments that derail a good workout. Most often, a few shoulder stretches are all that is needed to not just correct the issue but prevent it from occurring in the first place. That said, not many know how to properly stretch their shoulder to help stop shoulder pain from killing their workouts. In this video, I show you one of the most common shoulder maladies that causes discomfort when lifting and how to assess whether you are suffering from it so that you can fix it.

The shoulder joint is wrapped tightly by a fibrous structure called a capsule. The shoulder capsule has a posterior portion that is responsible for providing integrity and support to the humerus within the ball and socket. When the muscles surrounding the shoulder get tight (in particular the rotator cuff) those muscles have a tendency to push the head of the humerus forward in the shoulder joint. Once there, the capsule can begin to adaptively shorten which leads to much more chronic and serious changes in the joint.

To prevent shoulder capsule shrinking and tightness, you must have a way to stretch this structure out. First however, you need to determine whether or not the tightness you feel is from the capsule or from another muscle or muscles in and around the shoulder.

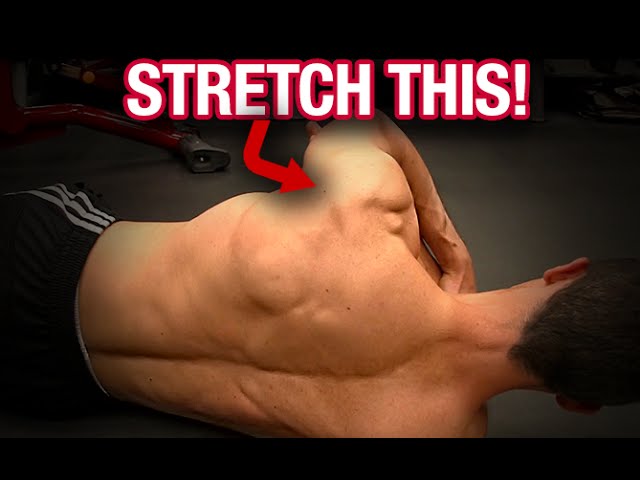
I show you a posterior capsule test that will help you to figure out what you are dealing with. Lie on your back with your arm fully internally rotated. Be sure that you are internally rotating the arm at the shoulder and not just pronating your forearm. From there, hold your arm perpendicular to the ground at ninety degrees and make sure that your back doesn’t roll and your shoulder blade does not lose contact with the ground.

Try to bring your arm across your chest. If you can get the outside of your elbow to cross your chest midline then you likely don’t have a tight posterior capsule and instead are dealing with either a tight posterior delt or lat. Stretches can be seen for those in future videos here on our channel.

The sleeper stretch as shown in this video is great for stretching out the posterior shoulder capsule and helping you to restore normal mobility within the shoulder joint. Be sure not to crank on your arm too much during this stretch and aim to complete it a few times each week for 45-60 seconds each time until you get up to 70 degrees of internal rotation back to your shoulder and can almost touch the ground with the fingers on the affected side.

If you want a complete workout program that helps you to restore maximum mobility and flexibility to unlock your greatest strength and size gains ever, be sure to head to http://athleanx.com and get the ATHLEAN-X Training System. Start using the same program used by hundreds of top professional athletes in all major sports to start reaping the rewards that these all stars see from their training.

For more videos on how to stretch your shoulders as well as how to stretch your hips and back, be sure to subscribe to our channel here on youtube at http://youtube.com/user/jdcav24
The Worst Way to Fix Sciatica (DO THIS INSTEAD!)

Bulletproof your body in 90 days – http://athleanx.com/x/bulletproof
Subscribe to this channel here – http://bit.ly/2b0coMW

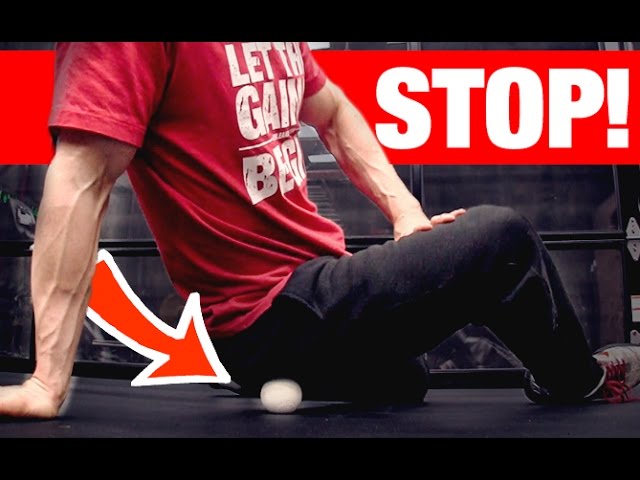
Sciatic nerve pain is one of the most common sources of discomfort, especially in men over 40 that lift weights. The reason why this is so common is that we do too many things that put us in position to suffer from sciatica in the first place, and then we don’t know how to fix sciatica once we have it. In this video, I’m going to show you why foam rolling and smashing the piriformis muscle with a lacrosse ball is the worst thing you can do to fix sciatica.

To start, it is important to differentiate true sciatic nerve pain from something that looks like sciatic nerve pain. If the source of your pain is from a bulging or herniated lumbar disk, then the stretches shown in this video are not going to fix your problem. In fact, you will want to make an appointment to be seen by a licensed physical therapist to help you treat your disc herniation another way.

On the other hand, if your sciatic nerve like symptoms are arising from the compression of the sciatic nerve from a tight piriformis, then you will want to pay close attention to what I am showing you here. Firstly, the nerve itself can get compressed by having a tight piriformis muscle. Because this muscle lies directly over the nerve as it exists the pelvis, there is a tendency for this muscle to compress the structure when it is tight.

Lately, we have been told by many that the best way to fix a tight muscle is to not stretch it but rather foam roll it or use a lacrosse ball on it to smash it. In this case, that is the worst advice you can be given. The lack of tissue thickness in this region (made worse by having weak or underdeveloped glutes) leads to a high probability that while attempting to ease the tension in the piriformis that you will be further compressing the nerve itself and causing more pain.

Even a foam roller does not adequately fix this problem since you will still be compressing the area, albeit with the force dispersed a little bit more evenly across the muscle than with the lacrosse ball. Either way, the treatment approach is not correct.

The best way to fix your sciatic nerve pain is to gently stretch the piriformis, but to make sure and do it consistently! 3-4 times per day for 5-6 days a week is a great start. Hold each stretch for 45 seconds to a minutes and make sure not to round your lower back in order to keep the focus on your hips. Place the tight hip in front of you with your knee and hip bent to 90 degrees and lean forward without losing the slight arch in your lower back.

You should feel an incredible relief without ever having to start cranking on the stretch or bearing through much discomfort when doing. It’s the same approach of doing the most you can do without doing more than your body can recover from, that has the ATHLEAN-X Training System creating loyal followers and great results every day. You can get the program at http://athleanx.com and start training like an athlete now.

For more videos on how to fix sciatic nerve pain and stretches for tight hips and hamstrings, be sure to subscribe to our channel here on youtube at http://youtube.com/user/jdcav24
How to Squat Properly (MAJOR FORM FIX!)

Squat with proper form and see explosive leg growth!
http://athleanx.com/x/build-legs-like-an-athlete

Learning how to squat properly is one of the most fundamental places to start if you're trying to make pain free gains in your legs. Proper squat form requires that you keep your head up, back angled slightly forward but straight, knees traveling outward as you descend, elbows tucked and chest out. Even with all of these tips and cues on how to squat properly, there is one major squat flaw that is still commonly performed.

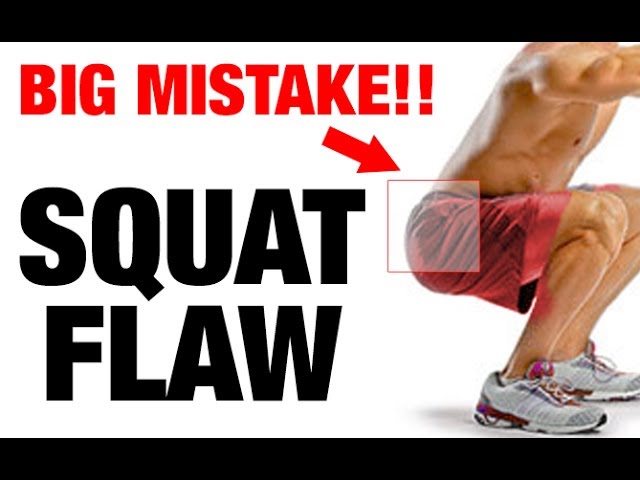
In this squat tutorial video I show you how to perform the squat exercise correctly by paying attention to the alignment of the hips in the transverse plane. Even when your feet are square and your chest is square to your feet, you can still mistakenly allow your hips to open up. This creates a rotational torsion on the pelvis. Though likely very small in absolute motion, this can lead to biomechanical changes in your squat that can cause hip, knee and back pain over time.

It's important to learn how to squat properly and to learn proper squat form if you want to keep your gains coming while minimizing injuries to other joints. Form is an important part of any exercise, but it's critical when it comes to the squat, given the loads that are often involved in the lift. The same issue applies to the deadlift as well.

In order to fix this squatting flaw you have to consciously contract your gluteus before every repetition of the squat. This will correct the alignment of the pelvis and make sure that your hips are not left open prior to the descent. It takes just an extra second per rep, but will pay large dividends to both your joint health as well as the gains you can see from your leg workouts.

For more physical therapy based training tips compiled into one 90 day program (the same exact one used by today's top professional athletes), then head to http://athleanx.com and get your complete ATHLEAN-X Training System.

For more leg workouts, leg exercises, and tips on how to improve your squat, be sure to subscribe to our youtube channel at http://youtube.com/user/jdcav24

Low Back Pain Relief (ONE MOVE!)

Build a your strongest back and body in just 90 days
http://athleanx.com/x/get-your-strongest-body-here

Low back pain is one of the most common and debilitating injuries that can crush your workouts and progress. Anyone that has ever had a bad back can tell you just how quickly it can prevent you from working out at all, let alone with enough intensity to see gains. In this video, I show you a single exercise that you can use to start getting low back pain relief in the weeks ahead.

The key to this movement sequence is that it attacks the back pain at its source rather than at its location. Too often, people feel the pain in their back and look for treatments that treat that pain. This is not a good long term approach for beating the lumbar pain once and for all. All you are doing is temporarily treating symptoms when you do this. If you want to get rid of the pain in your back once and for all you have to figure out what is causing it in the first place.

Most of the time, all pain can be sourced to a joint either immediately above or below the site of the pain. In the case of the lower back, you would want to look at either the hips below or the thoracic spine above. In my experience as a sports physical therapist, I can tell you it’s almost always the hips (and glutes specifically) that aren’t doing their job and aren’t trained to work in concert with the muscles of the lower back that tends to lead to the breakdowns and resulting low back pain.

The muscles of the lower back just aren’t strong enough to handle the responsibility of the glutes as well. If you can get your glutes to start contributing in the way they are supposed to, you’ll see just how fast you can actually start treating your low back pain and get rid of it by strengthening the source of the problem.

Here I show you three individual exercises that you can use to progress through your lower back pain treatment. First, if you are not acutely injured but are dealing with a chronic low back issue and have pretty significant weakness in your lumbar paraspinals you would use just a band. As I demonstrate in the video, walk yourself into a squat rack with the band anchored across your path. Allow the band to push you back into a normal hip hinge. Overcome the resistance of the band by contracting your glutes and standing as straight up as you can to tie in thoracic extension as well.

Moving on, you can load the lumbar extensors a bit more (provided you have more strength) by adding in the RDL component of the exercises. Perform the same hip / glute extension as well as the RDL and you will feel a great co-contraction between the two muscle groups that would prefer to work together all along.

Finally, you can get thoracic spine strengthening as well by performing a bent row in the middle of each rep to really take your low back pain relief plan to the next level.

If you are looking to build a much stronger body while fortifying your low back and get rid of back pain once and for all, be sure to head to http://athleanx.com and get the ATHLEAN-X Training System. Start training like an athlete and see just how fast you can reach your body’s potential.

For more videos on how to build a strong lower back and exercises you can do for back pain relief, be sure to subscribe to our channel here on youtube at http://youtube.com/user/jdcav24